- Using GNOME Keyring in XFCE4 for SSH Connections
Activate GNOME services for GNOME Keyring.
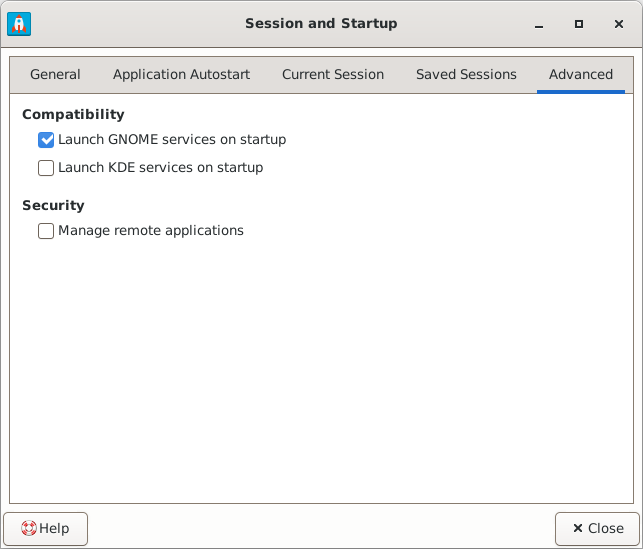
To use GNOME Keyring, simply tick the checkbox Launch GNOME services on startup in the Advanced tab of Session and Startup in Xfce’s settings. This will also disable gpg-agent and ssh-agent (gnome-keyring has its own associated ssh-agent).
https://forum.xfce.org/viewtopic.php?id=14950Application Menu > Settings > Session and Startup > Advanced > Launch GNOME services on startup
Creating a New SSH Key Using SSH Connector
Creating a New SSH Key Using Commands
Create a new ssh key by running ssh-keygen.
ssh-keygen -t rsa -b 4096 -C "hostname" -f ~/.ssh /username-host
Note: Use a password generator to create a unique string for the password. You can store the password or throw it away after adding the new key to the ‘Login’ keyring (GNOME Keyring). Throwing it away means that you will need to re-create the key if the key ever gets deleted from the Login keyring.
Copy the public key to the remote computer:
ssh-copy-id -i ~/.ssh/username-host.pub username@host
SSH in to the remote computer to permanently add the key to the Login keychain:
ssh -i ~/.ssh/username@host username@host
If all is functioning properly, you should get a pop-up from GNOME Keyring asking you to unlock the private key.
Add Key to GNOME Keyring
GNOME Keyring will display a GUI password entry dialog each time you need to unlock an SSH key. The dialog includes a checkbox to remember the password you type, which, if selected, will allow fully passwordless use of that key in the future as long as your login keyring is unlocked.
https://forum.xfce.org/viewtopic.php?id=14950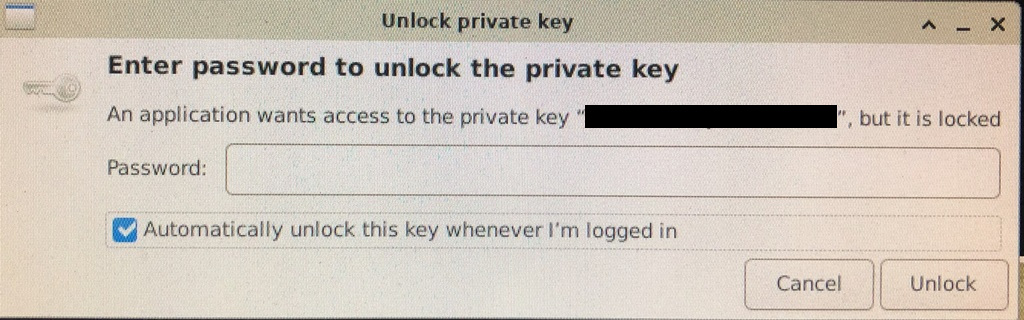
Make sure the ‘Automatically unlock this key whenever I’m logged in’ is checked, especially if you are discarding the password that was generated earlier.
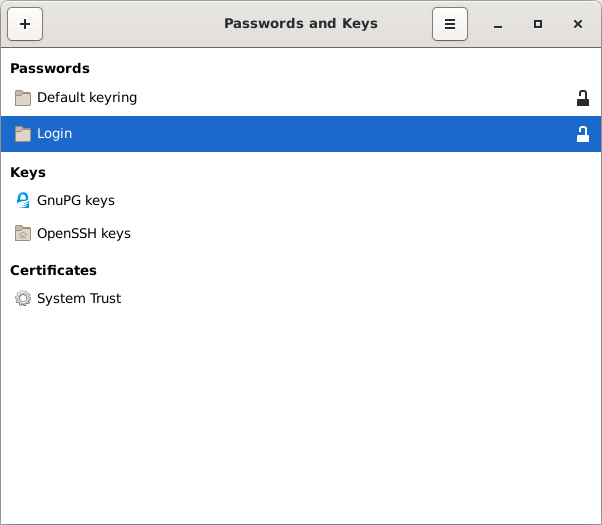
This means all you need is your master password to access all the keys added to the ‘Login’ keyring.
See the application ‘seahorse’. Click on ‘Login’ and it will list the known keys.
- https://forum.xfce.org/viewtopic.php?id=14950
- https://docs.xfce.org/xfce/xfce4-session/advanced#ssh_and_gpg_agents
- https://wiki.gnome.org/Projects/GnomeKeyring/Ssh
- https://docs.xfce.org/xfce/xfce4-session/4.20/advanced
- https://unix.stackexchange.com/questions/90853/how-can-i-run-ssh-add-automatically-without-a-password-prompt
- https://wiki.archlinux.org/title/GNOME/Keyring